INERTIAL MEASUREMENT UNIT ( IMU05, IMU05-S) - FEATURES
1) On the roof
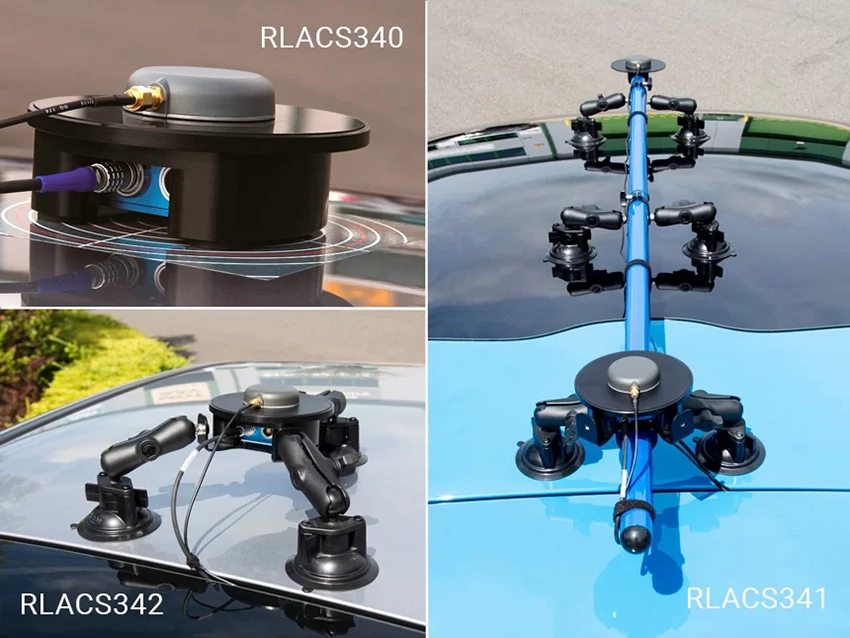
The easiest method of mounting the IMU is by placing it directly on the vehicle roof, co-located with the GPS antenna.
A specially designed IMU roof mount allows for an IMU05 to be securely fastened within the machined enclosure while it's magnetic base ensures that it stays safely in place.
The antenna can then be placed or screwed directly on top of the IMU Roof Mount (RLACS340 for magnetic antennas) allowing for the data sources to be measured at the same point.
By co-locating the antenna and IMU on the vehicle’s roof the distance between the two does not have to be measured, as you do in a standard setup, leaving only the required translation to – typically – the vehicle’s centre of gravity. This method is easier and isn’t prone to human measurement error. Co-locating the antenna with the IMU also greatly improves the performance of the Kalman filter.
When using a vehicle with a non-ferrous roof such as aluminium, carbon fibre or glass (sunroof), the magnetic based IMU Roof Mount will not hold and a suction mount is required along with the magnetic base.
With its three points of contact the Vacuum Tripod Mount (RLACS256) ensures a very stable fixture and reducesimu vibration that might be transmitted by the vehicle's roof.
The adjustable lever arms allow for the levelling of the IMU on a non-flat roof whilst extending the mounting options on the vehicle. For example, you can fix the mount partially or fully on a coupé's glass roof when trying to achieve a greater antenna separation in a dual antenna setup.
If you are testing with a dual antenna VBOX and need maximum antenna separation*, using a Roof Mounting Pole (RLACS171) in combination with the Pole Mount with Ferrous Plate (RLACS341) will enable quick antenna alignment.
An additional pair of pole suction arms is supplied to stabilise the IMU on the roof.
*Maximum antenna separation improves the accuracy of slip angle measurement

2) Within a vehicle using a mounting arm
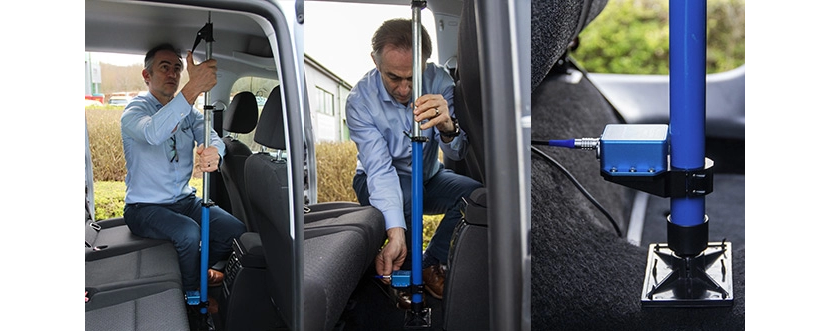
If roof mounting of the IMU is not possible the IMU can be fixed inside the vehicle. A flexible way to fix the IMU rigidly within the vehicle is by using the Racelogic mounting pole (RLACS212-v2). The three-part telescopic handle is fully adjustable to any length between 70 and 150 cm to which another 20 cm can be added by extending a third section using the compression lever.
Both ends are fixed to an 8 x 13 cm plate which sits on a joint to accommodate for uneven surfaces. The IMU can be screwed on the additional IMU pole mount bracket (RLACS294) which firmly sits around the pole. Pressed against the floor and the vehicle's ceiling, the mounting prop ensures that the IMU is fixed tightly.

3) Within the vehicle fixed to the body
It is also possible to fix the IMU firmly to the body of the vehicle. Make sure it is mounted in the direction of travel - as shown in the image below. It is also important to mount the sensor so that it is level with the ground.
For best results, mount the IMU and GNSS antenna as close to each other as possible. For example: Bolt the IMU to the seat rails and place the GPS antenna on the roof directly above.
You must also measure the relative position of the antenna in relation to the IMU to within +/- 5 cm. These distances can then be entered into the VBOX either via VBOX Test Suite or VBOX Setup or using a VBOX Manager.

